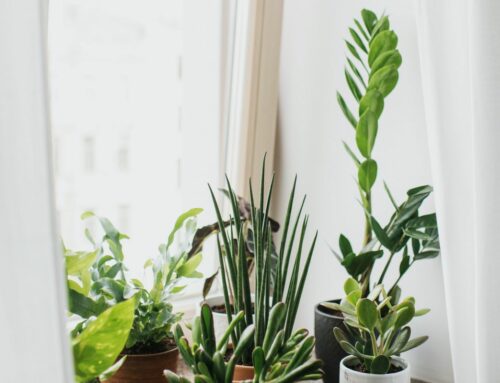
How to sterilize soil at home? It’s easier than you might have though. Whether you are a plant beginner or an experienced gardening enthusiast, you most likely are aware of the importance of the potting soil and its quality that you use for the health and vigor of your plants.
Soil due to its organic content, is the perfect breeding environment for different microorganisms, pests, plant diseases, fungi, and weeds. Some of these different organisms are even beneficial to your garden, some are neutral to plants while others can be harmful and can lead to problems with both indoor plants and an outdoor garden. This can in turn result in all of your green thumb efforts being futile and we don’t want that.
This post may contain affiliate links. Read our Privacy Policy and Disclosure here.
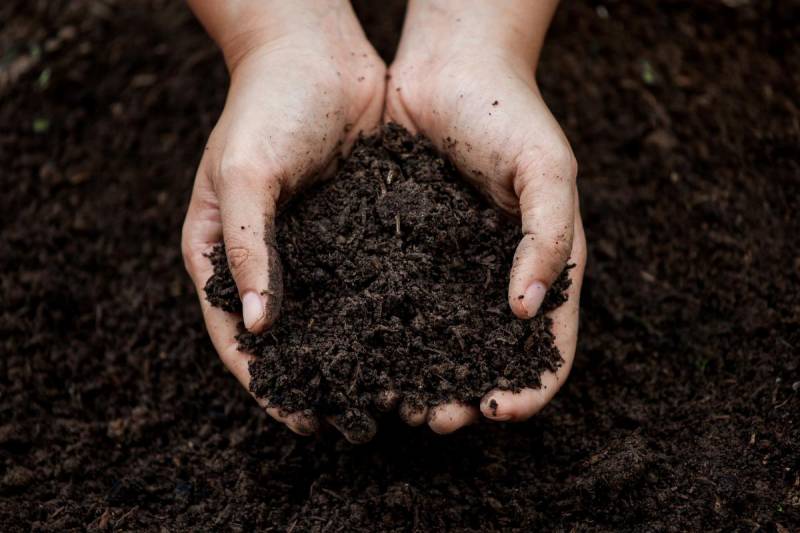
The majority of commercially bought potting mixes are sterile. However, the situation is different especially when it comes to the soil in your garden or when you are reusing potting soil for your indoor plants. Reusing soil can lead to potential problems for your newly potted plants due to pests and harmful pathogens.
Sterile soil provides your plants with an uncontaminated growing media / substrat.
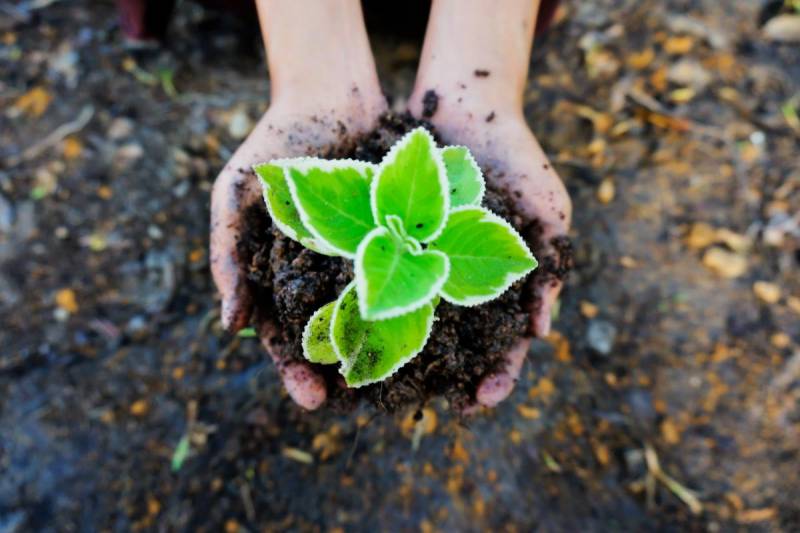
So how to reuse soil from old plants for new ones without any issues? By all means, you can go and purchase a new bag of sterile soil for your plants but if you don’t feel like constantly running to the store just for some dirt, you can go an alternative route by sterilizing your own soil at home.
So how to sterilize soil at home? It’s easier and faster than you might have initially thought. In this article, we will discuss the benefits of soil sterilization and the different ways you can sterilize soil at home easily and effectively.
What is Soil Sterilization?
Soil sterilization is the process through which soil has been disinfected and contaminants such as pests (like soil mites), weeds, fungi, viruses, other diseases, and pathogens have been removed. The process to sterilize soil requires either chemical or heat treatments.
Commercial growers (greenhouses), agricultural producers (farmers), and others that grow plants on a large scale frequently use soil that is sterile to prevent any harmful pathogens from negatively affecting or destroying their plants or crop production.
Note: Can soil actually be 100% sterile? No. Soil sterilization is actually soil disinfection. The reason being is that for the soil to be absolutely sterile it has to be 100% free of any pathogens which might be possible for laboratory equipment and liquids, but is not possible to remove microorganisms from soil 100%. This is fine because soil doesn’t have to be 100% sterile and clean to be used for plants.
Why Sterilize Soil?
Should you sterilize the soil you are using for your plants if you’re not a commercial grower? There’s not a clear consensus regarding this. Some hold the opinion that soil sterilization is unnecessary for plant enthusiasts, home growers, and hobby gardeners. This might be especially the case if your plants are already mature as mature plants are more resistant to harmful pathogens that be in non-sterile soil than seedlings, for example.
On the other hand stand the people that swear by sterilizing soil for their plants, even if they are not commercial growers. So at the end of the day: whether you choose to or not to sterilize the soil for your plants, there are pros and cons to both.
As mentioned, if you want to reuse old soil, especially for juvenile plants and seedlings, sterilizing it might give a better chance for your plants to establish themselves without them having to deal with pests, diseases, and other nuisance.
Here are the benefits (the pros) of sterilizing soil:
- Controls the spread of harmful pathogens like viruses, diseases, bacteria, fungi, pests
- Most sterilization methods are easy to do at home and don’t cost a fortune.
- If the temperature is kept in check, soil sterilization is a non-toxic process.
- Possibly more environmentally friendly than using harsh chemicals to get rid of pests and diseases. However, this has not been scientifically confirmed.
- Reduces weeds, hence, the labor and time needed to physically remove weeds
The drawbacks, i.e. the cons of soil sterilization:
- Soil sterilization can be a time-consuming and labor-intensive process.
- And in the common methods used to do it at home, apart from solarization, it is also energy costly.
- You have to be wary of how hot your soil gets: if your potting soil goes above 180°F (82°C), the soil might start releasing substances that are actually harmful to plants and can lead to phytotoxicity.
- If the internal temperature of the soil gets too high, there is an increased chance of phytotoxicity due to soluble salts, manganese, and toxic organic compounds. Soil that is rich in organic matter, containing for example manure, and compost, is more likely to release toxic compounds when overheated compared to soils that are low on organic matter
- Remember how I mentioned that soil sterilization kills microorganisms and different pathogens? Well, it doesn’t differentiate between good and bad ones, I’m afraid. This translates to: while soil sterilization might destroy harmful viruses, diseases, pests, and fungi, it can also kill beneficial insects and bacteria that are actually supporting the lifecycle of plants and their development: eg: mycorrhiza, springtails, etc. Good microbial flora is essential for the health and growth of plants as it helps them transport nutrients, helps them fight off harmful pathogens, clears off dead tissues before they can harbor harmful pests, etc.
However…
Some research-based findings1 have shown that even though sterilization significantly decreases the population of beneficial soil bacteria, certain species are able to quickly recolonize the soil and make up for the initial population loss. For example, species such as Pseudomonas and Bacillus, have been found to be able to restore and reach high population levels within a short period of time, despite the initial population number decrease. Thus, it seems that soil sterilization doesn’t eradicate certain beneficial microorganisms entirely.
When to Sterilize Soil?
If you have bought a fresh sterile soil mix from a high-quality brand that has been marked as sterile, then you don’t need to sterilize.
If, however, you plan to reuse some old soil, especially if the plant in it was sick and has succumbed to some rotting issues, then sterilizing the soil might be beneficial to the new plant or plants that are to grow inside.
But is every commercially available soil mix sterile? Not quite. Therefore, either opt to purchase a potting mix marked as sterile or when in doubt: consider sterilizing it at your own home.
Regardless of whether you are thinking to sterilize a handful of soil for some potted plants or for a garden area, you should do so before anything is being planted. Once there is a plant inside of the soil, it will do little to sterilize the neighboring soil but leaving some old one on the root ball of the plant as this will most likely result in cross-contamination.
So which plants will benefit the most from sterile soil?
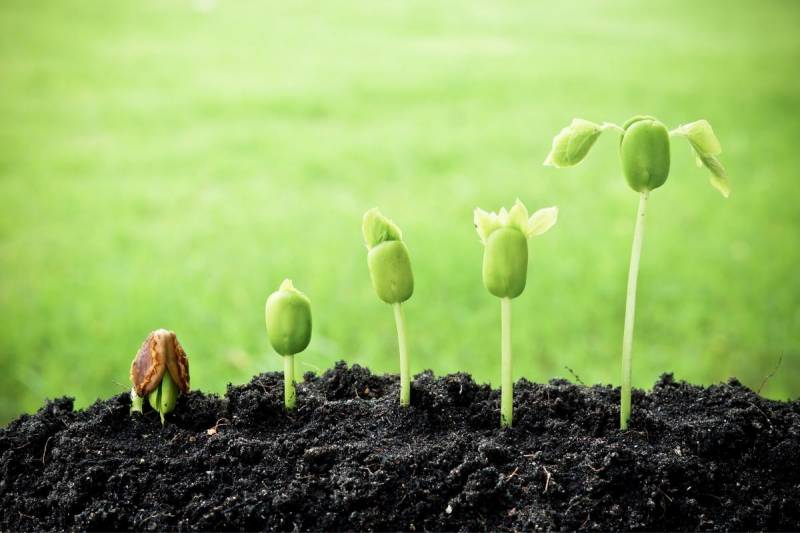
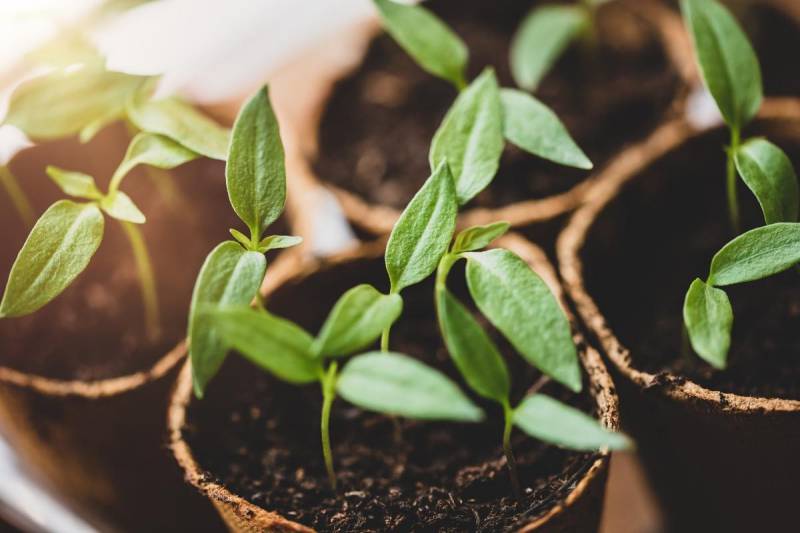
If you are attempting to germinate seeds, transplanting seedlings, plantlets, juvenile plants, or repotting sick plants that might have been having a rot-related issue, you should either use fresh soil for them or sterilize old ones. Seedlings and young plants are not as robust are older ones and can not always withstand and fight against diseases and other harmful microorganisms that contaminated soil might contain. Mature and healthy plants, however, can also flourish in non-sterile soil even if there are contaminants present in it, as strong plants can build up a natural resistance to cope with harmful microorganisms. However, if the plants are mature but are dealing with some environmental or other issues, they might be able less to withstand soil contaminants.
The following pathogens that are especially dangerous for young plants and seedlings get destroyed through soil sterilization: weeds and seeds, diseases, some viruses, nematodes, bacteria that might cause damping off, blight, fusarium wilt, verticillium wilt, harmful fungi, and mold.
What is damping-off? Have you ever had a seed sprouting only to see it a couple of days later laying lifeless on the ground? When a seed has just germinated, the little plant is not yet strong enough and damping-off happens when harmful pathogens, that are usually contained in the soil, attack the seedling. As a result, it withers and dies in a matter of hours sometimes. When the soil has been sterilized, these harmful pathogens (fungi in most cases) are terminated, hence, giving the seedlings a better chance of surviving their very vulnerable initial life stage.
How is soil sterilized? There are two main ways to sterilize soil: by treating it with chemicals or with heat. Both will be discussed next.
Chemical Sterilization
Chemically sterilizing potting soil is a method that should be used exclusively at facilities that are sterilizing soil on a commercial base. It is not safe to chemically sterilize soil at home as the process is not only costly but also can impose danger to your health.
Although chemical treatments are a relatively fast way to sterilize soil, the cons outweigh the pros when it comes to using chemicals to sterilize soil for hobby gardeners.
The drawbacks of chemical sterilization of soil:
- Due to chemicals being used, there is a health and safety risk for the person applying the chemicals.
- There is not one solution that fits all. Meaning, that in most cases, different chemicals have to be mixed to target different pathogens, as there is not a single chemical that would be able to eradicate a broad range of harmful microorganisms at once.
- The soil can’t be used immediately after application as the chemicals need some time before they degrade fully and are flushed out.
If the chemical application has not been done correctly, chemical residues might remain in the soil and can be detrimental to the development of some plants. - If chemicals are used for a prolonged time, certain harmful pathogens and microorganisms might develop resistance against them at some point leading to the chemicals being ineffective for soil sterilization.
The bottom point is: that if you are a home grower, it is best to avoid using chemicals to sterilize soil for your plants. Opting for heat sterilization methods is a much safer and easier choice.
Heat Sterilization of Soil
As mentioned earlier, there are many drawbacks to using chemical sterilization for soil. Therefore, using heat soil sterilization is a much safer and easier alternative to attempt at your home.
Heat treatments can be either direct, dry heat, or steam heat. Both types sterilize soil by increasing the temperature of the soil and keeping it constantly hot for a certain amount of time. Of course, to repeat it: using heat to sterilize soil it can’t be guaranteed that the sterility is 100%.
The table below shows what temperature is needed to be kept for 30 minutes to eliminate different soil pathogens. 2
| Pathogen | Target Temperature |
|---|---|
| water molds (oomycetes) | 120℉ (49°C) |
| most harmful plant fungi, bacteria, viruses, worms, slugs, centipedes | 145℉ (63°C) |
| soil pests | 160℉ (71°C) |
| weed seeds | 180℉ (82°C) |
| heat resistant plant viruses, and others | 212℉ (100°C) |
The 5 Easy Ways to Sterilize Soil at Home
There are 5 different methods that you can use to heat sterilize soil at your home, apart from chemical sterilization. The most common methods to sterilize soil used by hobby gardeners are:
- Microwave Sterilization
- Oven Sterilization
- Pressure Cooker Sterilization
- Water Bath Sterilization
- Solarization
Which one you choose will depend on the volume of soil that you want to sterilize, which devices and materials you have, and how much time you’d like to spend on sterilizing your soil. So before you get started with your soil sterilization, try to answer the following important questions:
How much soil do you want to sterilize?
Are you looking to sterilize a handful of potting soil for a single plant or maybe four? Then it is probably best to choose a faster way like sterilization in your microwave, oven, water bath, or pressure cooker. On the other hand, however, if you want to sterilize a large amount of soil for a flowerbed or an entire area in your garden or plant field, solarization will be a more efficient way to do so.
What devices do you have?
Solarization and soil sterilization through a water bath are the two methods that don’t require you to have any fancy devices at home. Solarization only needs some plastic sheets and strong sun rays. Steam sterilization through a water bath requires a large pot, wire rack, and a couple of containers.
The two methods mentioned above are great if you don’t have an oven, microwave, or a pressure cooker.
Below we will look at each of the 5 methods to easily sterilize soil at home so that you can decide which one will suit your needs the best.
How to Sterilize Soil in Your Oven
Yes, you can use your baking oven to make delicious muffins or a Turkey, but you can also use it to bake up a nice batch of sterile soil for your plants. Yum!
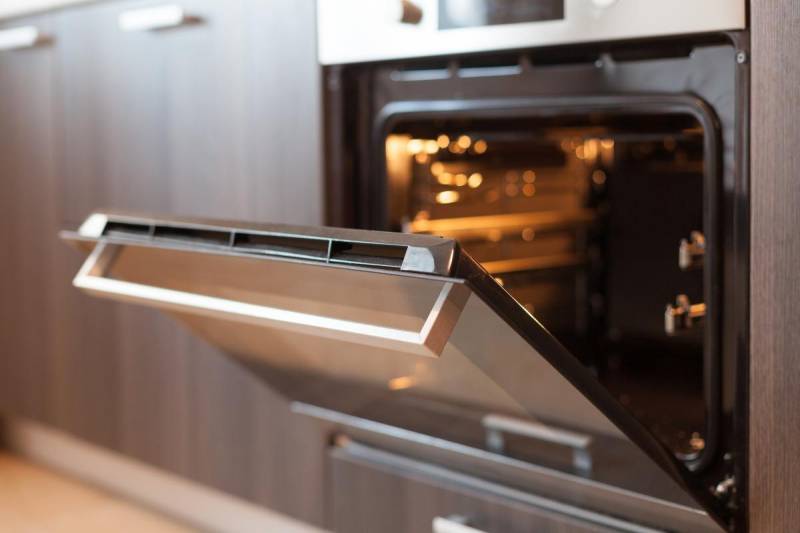
Using your oven to sterilize soil would suit you if you plan to sterilize medium-sized batches of potting soil at once. Depending on your oven, you can sterilize a lot more soil in it at once than in your microwave, for instance. And yes, you can use oven racks to position different oven-safe dishes inside to optimize the amount of soil you can sterilize at once in your oven.
The cons of using your oven to sterilize potting soil:
- If you attempt to sterilize soil in your oven, be prepared for the stink. Soil releases a rather unpleasant odor once it reaches a certain temperature and starts to bake. Hence, we would suggest only sterilize soil in your oven when you have enough ventilation around.
- Oven soil sterilization, compared to other methods like using heat from the sun or microwave, might not be as energy efficient and hence, not a nature-friendly way to sterilize soil.
What you’ll need to sterilize soil in the oven (apart from soil): a large oven-proof container, like a baking tray, aluminum foil, an oven-safe thermometer (hint: a meat thermometer would work well), and water.
How to sterilize soil in the oven, step-by-step:
- Preheat the oven to 200 degrees Fahrenheit or 125 degrees Celcius.
- Fill your chosen container with soil to about 3-4 inches (8-10 cm). You don’t want the layer of soil to be too thick as the middle part might not get hot enough.
- If you notice any large rocks, pebbles, or plant material like leaves, branches, etc – remove them before baking your soil.
- Mist the soil and stir well. You want the potting soil to be moist but not drenched. So ensure that our soil is not becoming too sticky and forming clumps due to too much moisture.
- Can you sterilize dry soil? You can but there will be parts that will not get even heat distribution, hence, some pathogens will not be eliminated. The moisture creates a steaming effect inside of the soil and helps the heat be evenly distributed.
- Cover your oven-safe dish with aluminum foil entirely.
- Place your oven-proof container filled with soil in the oven and in about 10 minutes, use the oven-safe thermometer to check the temperature of the soil in the middle of the container. Once the temperature reaches 180°F (82°C), set a timer and bake the soil for 30 minutes. Try not to open the oven door while the soil is baking to prevent heat from escaping.
- Once 30 minutes have passed, turn off your oven and allow the soil to cool down inside naturally.
- Once the soil has cooled down to room temperature, you can serve it directly to your plants with a pinch of love :) or store it for future uses in an airtight container.
How to Sterilize Soil in a Microwave
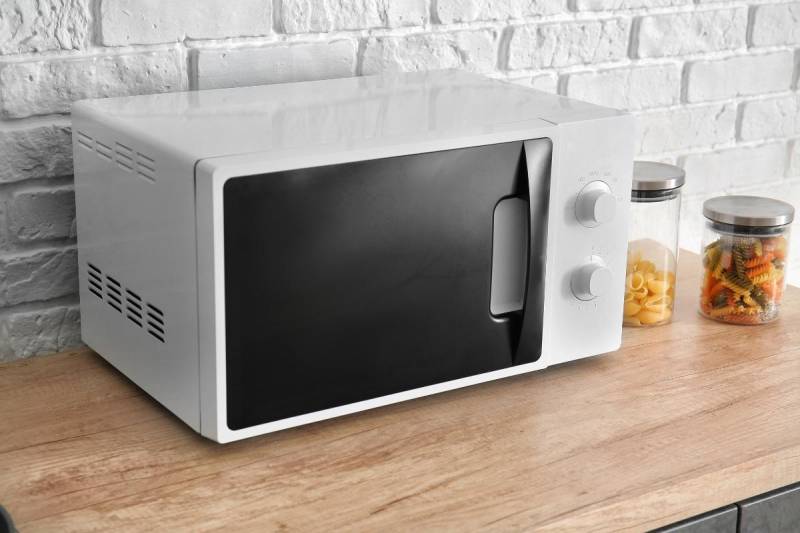
Sterilizing soil in your microwave is a good alternative to doing so in your oven, especially if you are dealing with a small volume of soil. Microwaving potting soil is faster than baking it, hence, the energy consumption should be lower depending on your device.
One big drawback of sterilizing soil in the microwave is that the unpleasant odor will still be present (just like with oven soil sterilization). In fact, your microwave might also start smelling a tad bit like soil afterward so it would be a good idea to clean the device after using it to sterilize your potting soil.
What you’ll need to sterilize soil in the microwave: either a heat-safe zip lock bag or a plastic container that is safe to use in a microwave or… just a microwave-safe bowl with a microwave-safe dish, heat-safe thermometer (again, if you have a meat thermometer laying around, they are great to use to check the internal temperature of the soil), water.
How to Sterilize Soil in Your Microwave (step-by-step):
- Inspect your potting soil to ensure that there are no metal pieces inside. It’s important to remove any metal parts from your soil before placing it in your microwave as else, you risk a hap-hazard situation.
- Mist your soil to ensure that it is moist. Again, don’t make the soil too wet so that it clumps up. You want it to be moist, not soggy.
- If you are using a microwave-safe zip-lock bag: fill your bag until it is approximately 80% full and don’t close it fully. Allow a little opening so that the steam that will form can escape from somewhere.
- If you are using a microwave-safe dish with a lid, do the same and fill the container almost to the top. Place the lid on it but don’t close it.
- If you are using just a normal bowl with a plate on top – fill the bowl with soil to the top and put the dish on top. Allow a little opening at one side so that steam can escape.
- Place your chosen container in the middle of your microwave and start the microwave on high for 1 min.
- Note: Microwaves and their strength varies, hence, if you have never sterilized soil in your microwave before, you would need to check often the internal temperature of the soil and adjust the heating times accordingly.
- Use your heat-safe thermometer to check the temperature of the soil in the container every minute or so before cooking it again for a minute. Always stick the thermometer in the middle of the container or zip-lock bag.
- Once the temperature of the soil reaches 180°F (82°C), it’s ready. Close the container and allow the soil to cool naturally to room temperature.
- Once the soil has cooled to room temperature, you can safely use it for your plants. Alternatively, you can store it in an airtight container for future uses.
How long should you microwave soil? The time soil would need to be cooked in the microwave to be sterilized will depend on different devices. The general rule of thumb to follow is: every 1kg (2 pounds) of soil would roughly need about 2 to 2 and a half minutes on full power to be sterilized. That is considering a microwave that is 650 watts.
How to Sterilize Soil Using Steam
Apart from using dry heat like in a microwave or in your oven, you can sterilize your potting soil also by means of boiling water or steam. Some prefer to sterilize their soil using steam due to the ease of the method, the lack of unpleasant odor, and also, soil that has been sterilized using steam might be better disinfected compared to using dry heat treatment.
If you have a pressure cooker, sterilizing your potting soil in it is quite easy. Just make sure to always follow your device’s instructions and guidelines to avoid any dangerous situations. Alternatively, if you don’t have a pressure cooker, you can still sterilize potting soil by means of steam with the use of a simple pot. A step-by-step guide on how to use either method to steam sterilize potting soil will be mentioned next.
How to Sterilize Soil in a Pressure Cooker
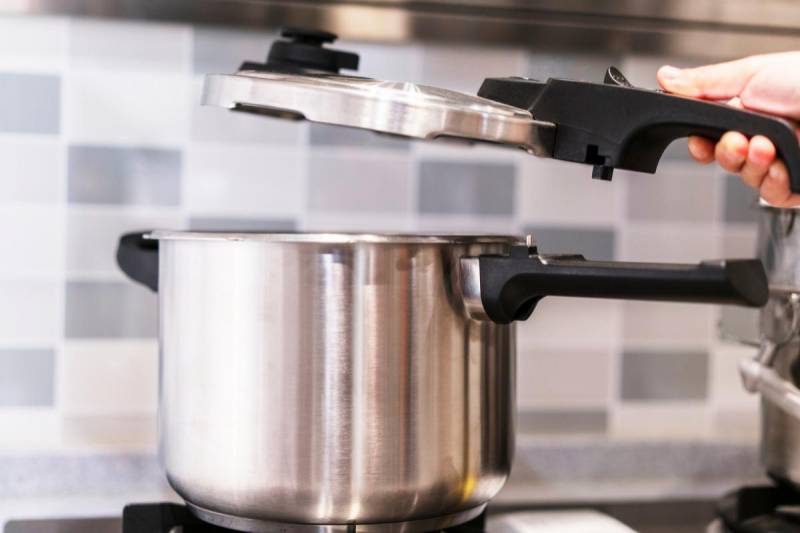
What you’ll need: a pressure cooker, pressure cooker rack, heat-proof containers, jars or bags that are safe to use inside a pressure cooker, aluminum foil, water, and the most obvious one: potting soil.
Step-by-step pressure cooker soil sterilization method:
- Place the rack inside of your pressure cooker and add water as indicated in the manufacturer’s instructions. For different devices, different amounts of water would be necessary but this is usually 2-4 cups (500ml to 1L).
- Slightly pre-moisten your potting soil. Remember slightly moist, not drenched wet.
- Fill the pressure cooker containers or jars with soil. Make sure that the soil is not deeper than 4 inches (10 cm) to allow equal distribution of the steam.
- Cover the containers/jars with aluminum foil and place them inside the pressure cooker. Read below for more info on using jars.
- Close the pressure cooker and follow the manufacturer’s instructions in starting it to build steam.
- Depending on how much soil you are sterilizing at once, the “cooking” time inside the pressure cooker will vary. The general rule is that for about 10 pounds of soil, the pressure cooker would need to work for roughly 20 mins to sterilize the soil effectively.
- Once that time is over, release the pressure from the pressure cooker as indicated by the manufacturer’s instructions.
- Allow the soil to cool to room temperature. You can use it immediately once it has cooled down or store it in airtight containers for future uses.
Can you sterilize potting soil in an Instant Pot or another Multicooker? Yes, you can! Sterilizing soil in your Instant Pot (Multicooker) is just as easy as sterilizing it in a pressure cooker. Just make sure to select the program “Pressure Cook” or “Steam” on your Instant Pot device and set the timer to roughly 20 mins for about 10 pounds of soil.
Don’t have a special pressure cooker-safe container? If you have old jars with metal lids (no plastic lids!), you can use most of them safely in a pressure cooker or an Instant pot to sterilize potting soil in them. In this case, you wouldn’t even need aluminum foil. Simply place the rack at the bottom of your pressure cooker or Instant pot, fill up enough water and place the jars filled with soil on top of the rack. The jars should be filled to about 80% capacity with soil but not all the way to the top. While placing them inside: bear in mind that the water should not be touching the bottom of the jars, so they would need to be placed high enough. Next on, just put on the metal lids on the jars. Do NOT screw the lids! Just literally place them on top of the jars without screwing them up. That’s it. Then allow your device to build pressure and cook your soil. Once the 20 minutes are over, release the pressure, and when the jars are cool enough, you can simply screw the lids easily and tadaa: instead of a batch of marmalade, you have a batch of delish potting soil for your plant family members.
How to Steam Sterilize Soil Without a Pressure Cooker
You don’t have a pressure cooker/Instant Pot/Multicooker but would still like to try sterilizing your potting using steam. We got you. You can steam sterilize soil using the water bath method. Here is a step-by-step guide on how to sterilize soil without a pressure cooker but just as effectively.
What you’ll need: a large, tall pot with a lid, wire rack, heat-safe containers or jars, aluminum foil, water and you guessed it: soil.
How to sterilize soil using a water-bath:
- Place the wire rack inside of your pot and add water enough to cover the bottom with about 1-2 inches / 2-4cm. However, don’t add too much water as you don’t want the stand of the wire rack to be submerged in water.
- Pre-moisten your potting soil slightly. Make sure it’s not drenched and clumpy but just barely moist.
- Fill your chosen heat-safe container or jars with soil. Aim for the soil to be below 4 inches (8 to 10 cm) deep to ensure equal heat distribution everywhere. And ensure that the containers/jars are not filled all the way to the top with soil but there is at least an inch (2 cm) space above the soil level.
- Cover the containers or jars using aluminum foil tightly.
- Place the containers/jars on the wire rack. Again, ensure that the water level inside of the pot is not too high that it touches the bottom of the jars or containers with soil. Don’t stack the containers/jars on top of each other.
- Put the lid on the pot but leave a slight opening so that steam can escape.
- Turn on your stove on high, put the pot on, and bring the water inside to a boil.
- Once the water starts boiling, bring the heat down a notch and let the water boil for about 30 minutes. The water needs to be boiling gently, you don’t want it to aggressively bubble.
- Once 30 minutes have passed, turn off the heat and allow the soil to cool down to room temperature.
- Once the soil has reached room temperature, you can use it straight away for your plants or store it in containers for future uses.
How to Sterilize Soil in the Sun (Solarization)
If you don’t want to use extra electricity but would rather rely on the natural power of the sun (go you, by the way!), then you can sterilize your soil through solarization. This soil sterilization method works by using plastic sheets and the natural heat from the sun to raise the temperature of the soil and ideally, get rid of harmful pathogens and pests.
Soil sterilization through solarization can be done in several ways. The method you select is up to you, but the results will be similar.
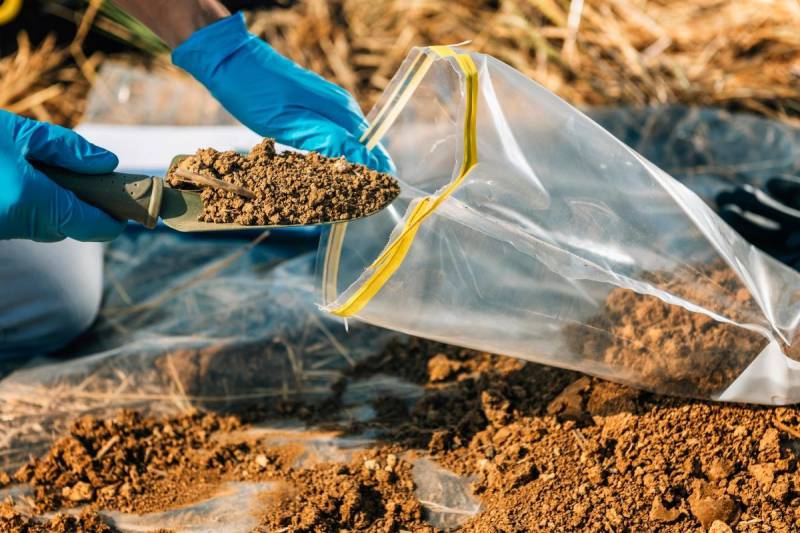
If you want to sterilize a small amount of soil, you can simply use ordinary plastic bags or zip lock bags for the process of solarization. Simply fill about halfway the bags with soil, close them and place them somewhere where there is direct sunlight. Make sure to lay them as flat as possible as the thinner the soil layer is, the more effective the sterilization will be.
If you have larger amounts of soil to sterilize, the process is similar but instead of using ordinary bags, you lay the soil in thin layers between sheets of plastic.
If you want to sterilize large portions of soil or your entire garden, start by covering the soil with a layer of plastic. This way, you are creating a greenhouse effect and the heat from the sun will get trapped inside of the soil and thus, get rid of unwanted pathogens. Place the plastic in a location where it can heat up in the sun. For best results, keep the plastic facing the sun for as long as possible, at least a week long!
Does it matter what type of plastic cover or bag you use for sterilization? Yes. For best solarization results, aim to use a clear/transparent bag or cover so that the sun’s heat and radiation will be able to penetrate the soil as well as possible. Thin covers would work well but they also might tear up easily which will create unnecessary trash as they might not be able to be reused another time. Therefore, opt for plastic covers that have medium thickness and a good durability score so that you can reuse them later whenever needed.
What you’ll need for soil solarization: plastic sheets/covers or bags, heavy pebbles or stones, a location that is receiving direct sunlight
How to sterilize soil by solarization (small batches):
- Remove any debris or stones from the soil.
- Mist the soil a bit to ensure that it is moist but not drenched.
- Fill your plastic bags or zip-lock bags approximately halfway and close them securely.
- Place your bags in a location that is receiving direct and strong sunlight, and ensure that the soil is spread inside in a thin layer.
How to (medium batches): - Before you start, prepare the soil that you’d like to sterilize by removing any plant matter, or stones and by breaking down clumped-up soil parts.
- For medium batches of soil: lay a plastic sheet on the ground and spread the soil you want to sterilize on top of it. Aim for the soil layer to be as thin as possible and keep the edges of the sheet clear.
- Mist the layer of soil so that it is lightly damp but not soggy.
- Cover the soil with another plastic sheet and place the heavy stones/pebbles at the corners and borders to ensure that wind won’t blow the sheets away and that the soil is staying intact inside of its cover. You can also tuck the corners of the sheets into the ground.
How to sterilize soil by using the Sun’s heat (large batches or garden areas):
- Break down any large clumps of soil and remove stones, debris, and dead plants.
- About a foot of the soil needs to be damp before you start solarizing it. Therefore, before you start, water the ground, or even better: wait for rainfall and then proceed with sterilizing your garden soil.
- After the upper foot of the soil has been dampened, it’s time to cover it with a sheet of plastic.
- Cover the entire area that you’d like to sterilize with a plastic clear sheet and then secure the corners and borders of the sheets with heavy objects like stones. You can also tuck in the corners into the ground to ensure that the soil is as fixed as possible inside of its cover.
How long does it take for soil to be sterilized through solarization? This depends on the amount of soil you’d like to sterilize and on the weather conditions at your location. For a small amount of soil distributed thinly in bags, placed under strong heat and sun, the soil could be good to go in about a week. For larger areas, it can take anywhere between 4 to 6 weeks of high heat strength sun for the soil to be successfully sterilized. However, this period might be longer, if the sun heat is not at its strongest and the weather is more on the chilly side.
Do beneficial organisms die due to solarization? The answer is so far inconclusive but it is believed that a lot of beneficial soil bacteria and other organisms are either able to withstand solarization and survive, or can quickly repopulate the soil once again afterward. So in terms of the biome of soil, it seems that while heat sterilization might damage it, solarization might be a better alternative to ensure that the soil maintains its natural beneficial microbial flora.
Sterilizing Soil: Final Thoughts
To remove harmful organisms, weeds, and plant pathogens, soil can be sterilized through means of chemical or heat treatment. Usually, most store-bought soil mixes have been sterilized beforehand but if you plan on reusing old soil, it is a good idea to sterilize it first, especially if using the soil to germinate seeds, transplant seedlings, or grow young, juvenile plants. It is always a good gardening practice to use sterile soil whenever possible for seedlings and young plants that might be vulnerable to harmful soil-borne organisms. If you don’t have fresh sterile soil available for your plants, you can safely reuse old one by sterilizing it at home.
In this article, we have discussed five easy methods that you can use to sterilize soil at home using our step-by-step guidelines. Although it is not always a must to sterilize soil before planting something inside, it is a good extra step that you might want to take to have peace of mind that you have done all you could to ensure that your plants stay and remain healthy.
References:
- Sorum, K. (2017). Microbes that help and harm your garden. In: Microbiologics.com.
- Gamliel, A., Hadar, E., & Katan, J. (1987). Microbial phenomena related to increased growth response in solarized soils and to monoculture systems. In: Proceedings of the 7th Congress of the Mediterranean Phytopathological Union. books.google.com