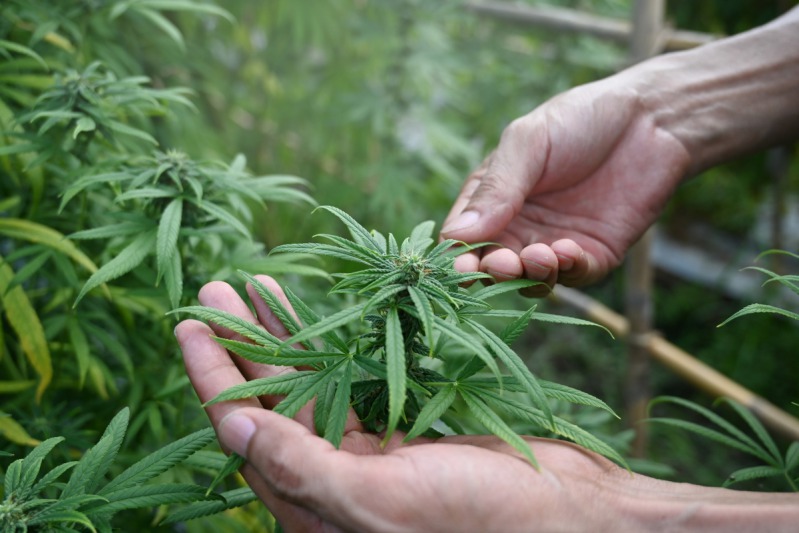
How to grow weed easily, and how long does it take to harvest the buds? If you live in a region where marijuana is no longer a taboo and is legally allowed, that’s probably a question on your mind.
The global tolerance towards personal cannabis consumption and cultivation, in some cases, has been increasing recently. The latest country that will possibly be giving green light to grow weed indoors for personal consumption (up to 3 plants) is Germany.
However, is it worth it to grow your own weed indoors and is it even possible to successfully grow your own cannabis?
Growing weed at home allows for controlled production of high-quality plants and provides cannabis growers with more privacy and security. Home production ensures:
- More control of all aspects of the cannabis growing environment (e.g., strain, substrate, light, nutrients, irrigation)
- More flexibility in shaping and pruning cannabis plants,
- Can grow weed at any time of the year and get continuous/multiple harvests
Indoor <> Outdoor
Unlike outdoors, the indoor grower has control over the growing medium, water, nutrients, temperature, humidity, and other aspects that can be adjusted to grow the best plants. Indoor growing is not tied to the seasons and allows the grower to start another batch whenever they want.
Ready to grow your own weed? In this detailed plant care guide, you will learn all the important tips, tricks, and hacks that you need to know to successfully grow cannabis plants in the comfort of your home.
This post may contain affiliate links. Read our Privacy Policy and Disclosure here.
Cannabis: The 4 Growth Stages
Thinking of growing your own weed? Then you need to be aware of the four growth stages of cannabis plants.
If marijuana is grown from seed, then the following are the 4 phases of cannabis plant growth:
- germination (lasts between 3-10 days)
- seedling (2-3 weeks)
- vegetative (3-16 weeks)
- flowering (8-11 weeks)
This means that the cycle from seed to harvest for cannabis plants is anywhere between 10 and 32 weeks, i.e. 3 to 8 months.
How long will it take from the initial stage to harvest depends on whether the plants are grown from seed or not, and on the size of the strain, i.e. smaller plants take less time to be grown until they are ready for harvest. Usually, clones, i.e. cannabis plants grown from cuttings, will be ready sooner to be harvested compared to plants grown from seeds.
Autoflowering weed plants are those that don’t mind how many light hours they receive each day and simply start flowering much earlier on.
The vegetative stage has the most variability in growth time, while the flowering stage typically takes about eight weeks, but this can vary depending on the strain.
When growing marijuana indoors, you have control over the size of your plants by initiating the flowering stage whenever you decide that the plant has grown large enough during its vegetative stage.
The care during the whole lifecycle leads to the final goal: harvesting. The number of harvests, the quality and the quantity of weed produced depends on factors such as plant size, frequency of harvests, low-stress training (eg: lollipopping, stem bending, etc ) and the strain itself.
Cannabis plants require slightly different care during the different growth stages. Make sure to check out our detailed guide on how to grow marijuana plants indoors based on their growth stage.
Light

When it comes to growing weed indoors, light is the one factor to rule them all. So first thing’s first, lets start with what are the cannabis light requirements if one wants to grow these plants successfully indoors.
Unlike the majority of houseplants that can be grown in just about any corner of your home and would require something like bright, medium, or low light, growing cannabis indoors is more complicated.
In other words: if you want to grow weed indoors successfully, it is pivotal that you ensure that the cannabis plants are getting sufficient light.
One of the most important aspects when it comes to growing weed plants indoors successfully is light. Cannabis plants also have different light requirements during the 4 different stages, i.e. during the vegetative stage, weed plants need significantly more light hours per day compared to plants in the flowering stage.
Those who grow cannabis outdoors have the upper hand to indoor growers as the natural cycles of the day in an outdoor setting are sufficient for weed plants. So if you are growing your weed plants outside, feel free to skip to the next part of this marijuana growing guide.
How much light do cannabis plants need?
Cannabis plants require a significant amount of light to grow and thrive indoors.
During the seedling or clone stage, cannabis plants need at least 12 hours of light per day, however, young plants shouldn’t be exposed right away to harsh light and should be acclimatized gradually.
In their vegetative, aka growing stage, weed plants need at least 13-18 hours of light per day to enter this growing stage and to maintain vegetative growth.
To trigger the flowering stage, the number of light hours per day would need to be decreased from 18 hours to 12 hours. This means that weed plants need at least 12 hours of darkness during the day to trigger flowering.
How to choose the right light for cannabis plants?
Usually, very few people growing weed indoors would opt to just place their plants next to a window and let nature take its course.
This is because cannabis plants are very (and I mean very!) responsive to light and if placed vertically next to a window, will start growing in impossible shapes.
Also, growing cannabis with only natural light indoors is rarely sufficient and might result in slower growth or low-quality harvest. And let’s be honest, no one really grows weed plants for their looks.
The intensity of the light is also important, as cannabis plants require high-intensity light to produce large, dense buds. A good quality LED grow light with a full spectrum of light wavelengths is recommended for indoor cannabis growing, as it can provide the necessary intensity of light while also reducing energy costs and heat production compared to traditional HID lights.
The distance between the grow lights and the plants is also important, as too much light or heat can damage the plants. A distance of about 18-24 inches between the grow lights and the tops of the plants is generally recommended for LED grow lights, but this can vary depending on the specific type of grow light and the stage of growth of the plants.
To achieve successful growth during the vegetative stage, a grow light with a wattage of 100-125 is recommended. However, when it comes to flowering (which typically occurs 4-6 weeks after vegetation), a grow light with a wattage of 250 and above is needed. It’s also essential to have a ballast to regulate the energy supply, a reflector to direct light downwards, a lamp with suitable wattage (preferably between 250 and 400 watts), and a strong chain to hang the light.
Different types of lights are available, with varying gas types. For the vegetative stage, metal halide lights are preferred because they produce more blue light. For the flowering stage, sodium lights are preferred because they produce more red light. Fluorescent lights can be useful for seedlings or propagating plants. LED lights are becoming more popular due to their energy efficiency, continuous use throughout the growing process, and lack of warm-up time, but they can be costly.
It’s also important to note that cannabis plants require a period of darkness to properly develop, so it’s important to provide a consistent light schedule with periods of uninterrupted darkness.
What is the best light schedule for weed plants?

I.e. how much light does a cannabis plant really need? A proper light cycle is important for a healthy and vigorous growth for these plants.
There is such a thing as too much light when it comes to weed plants. Cannabis need their dark hours as well and should not be 24/7 under light. Having pure dark hours is important for the plants health and growth. Too much light can lead to cannabis plants exhibiting signs of light stress or even light burn (if the intensity of the light is too strong).
Therefore, to ensure that you don’t experience light bleaching and other light-related problems with your weed plants, it is recommended to follow the following cannabis light schedule based on the growth stages of the plants:
During the vegetative stage, one should aim for an 18-hour light/6-hour dark cycle to ensure that weed plants are receiving enough light to grow strong, large and with multiple lateral growth points (i.e. side branches).
During the flowering stage, a 12-hour light/12-hour dark cycle is recommended to help promote bud development.
Important: Remember, weed plants will enter their flowering stage once provided with 12 hours of darkness, so to trigger the development of buds, the light hours per day would need to be reduced.
Watering

The frequency with which you should water your cannabis plants depends on several factors such as the stage of growth, the size of the plants, the type of growing medium, humidity levels, and the temperature of the environment.
If weed plants are grown in potting soil:
In general, it is recommended to water cannabis plants when the top inch or two of the growing medium feels dry to the touch. Overwatering can lead to root rot and other problems, so it’s important not to water too frequently.
During the vegetative stage, which is the period of active growth before the plants start to flower, cannabis plants generally require more water than during the flowering stage. As a general rule of thumb, you can water every 2-3 days during the vegetative stage and every 3-4 days during the flowering stage.
However, it’s important to monitor your plants closely and adjust the watering schedule as necessary based on their specific needs. If you notice that the leaves are drooping and turning yellow or the soil is staying wet for too long, you may need to water less frequently. On the other hand, if the leaves look droopy and limp and the soil seems dry and separating, the weed plants require more frequent irrigation.
Tip: If you are unsure whether your cannabis plants need water or not, rather stay on the more dry side as these plants can quickly develop root rot issues. A quick tip to determine whether the weed plants need water or not (without checking the soil) is to observe the foliage. If the leaves on the plants look perky and feel strong, the plants are most likely not thirsty just yet. However, if you notice that the leaves start going down a bit and feel thinner, it is a good idea to check the soil and water the plant thoroughly.
If weed plants are grown hydroponically or semi-hydroponically:
If you opt to grow your plants the non-traditional way, then you would need to water your plants most likely on a fixed schedule, or ensure that the plants have access to a well-adjusted, nutrient-dense water reservoir.
So should you use osmosis or distilled water for your cannabis plants?
Depends.
Using clean water (aka free from water sanitizers and salts which are usually found in tap water) would be best for your weed plants to ensure that their growth is uninterrupted and that harmful salts are not building up in the growing media which could potentially damage the root system.
However, the good news is that even though your weed plants will appreciate clean water, you don’t necessarily need to go overboard with it.
If your tap water is drinkable, you can also use it for your marijuana plants as well. However, you can use an EC meter to measure the dissolved salts in your water to be certain. Ideally, the plain water should have a range of 50-300 ppm.
Alternatively, if you want to go the extra mile for your plants, you can also use rainwater, osmosis water, or distilled water.
The temperature of the water you use for your weed plants matters too. The best would be to use water between 18°C and 24°C (65-75°F). In this temperature range, the water is ideal in terms of not stressing the plants’ roots and also has the optimum amount of dissolved oxygen (and cannabis plants love it when their roots can breathe!).
If the water you use for your marijuana is too cold, the plant might experience a cold shock and the roots might not be able to absorb nutrients efficiently. On the other hand, using hot water for watering your plants leads to an increased risk of root damage and creates an environment for harmful pathogens – think root rot.
And don’t forget, when it comes to weed plants being grown indoors, just your tap water won’t be enough. You would need to add nutrients whenever watering your cannabis plants, however, the nutrient concentration and demands will depend based on the growing stage that your weed plants are currently in (more on that below).
And one last thing when it comes to watering your cannabis plants the right way: to ensure optimum nutrient absorption check the pH of the water before giving it to your plants. The best pH range for weed plants is between 5.8-6.2.
Tip: Use a pH meter to check the pH of the water after adding the nutrient solution. If needed, use pH Up or pH Down whenever necessary.
Growing Media

There is not a one-size-fits-all when it comes to choosing the perfect growing media for cannabis grown indoors.
So if you plan to grow weed, there are various options to choose from such as soil in pots, rockwool (stone wool) cubes, coconut coir, hydroponically, semi-hydro, and more!
Therefore, beginner marijuana growers might feel overwhelmed at first but fret not, whichever growing media one opts for, they all have their perks and drawbacks.
Growing weed plants in soil
Growing cannabis plants in good old-fashioned soil is one of the best choices for beginners as this growing media is pretty forgiving.
There are a couple of things to keep in mind if opting to grow weed plants in soil:
- NO to high-salt fertilizers: it is vital that high-quality potting soil that doesn’t contain any artificial slow-release fertilizers is used
- YES to good bacteria: soil mixes enriched with Trichoderma are great for seedlings and young plants as they support the development of a strong root system and protect it from harmful pathogens. Once plants are mature, a healthy population of mycorrhizae helps the plant convert organic matter into nutrients and ensure optimum growth.
Tip: Therefore, if you are opting to use a ready soil mix for your weed plants, check if these good guys are already present. Alternatively, you can also buy Trichoderma and Mycorrhizae separately and add them while watering your plants.
The best potting soil for cannabis
If you are new to gardening or to growing weed, you might want to opt for a ready soil mix that has been specially formulated for the needs of cannabis plants. These high-quality potting soils usually are enriched with sufficient nutrients for the whole growth cycle of a cannabis plant. This means that if using a growing mix that has been specially formulated for marijuana indoors, you wouldn’t need to use any soil top-ups (eg: mycorrhizae) or fertilizers. This type of soil is also known as “super-soil”.
You can most likely find “super-soil” for your weed plants in a local nursery or purchase it online. Alternatively, you can create your own potting mix by mixing worm castings, bat guano, coir, and other components and allowing it to sit for 2-4 weeks to mature.
There are many different recipes online for the best super-soil for weed plants. We read a lot of different information but ultimately decided to share a recipe by a reputable weed seeds seller. I mean, the best ones to ask would be the ones that grow weed plants (massively) themselves, right?
Here is a suggested cannabis super-soil recipe by Zamnesia:
- 2 x 40L base soil*
- 5 to 10kg worm castings (opt for organic if possible)
- 1kg blood meal
- 1kg bone meal (steamed)
- 1kg bat guano
- 750g rock phosphate
- 28g (⅛ cup) Epsom salts
- 60g (¼ cup) azomite
- ½ cup dolomite
- 1 tbsp. humic acid (powder)
*You can either create your own base soil by using homemade compost or purchase it online.
Mix all ingredients thoroughly and if not using the super-soil for your cannabis plants immediately, store it in airtight containers.
Growing Marijuana in hydro/semi-hydro

Growing weed plants hydroponically means that the plants will be grown without soil and fully in water throughout the whole life cycle. With hydroponic systems, the roots of the plants are submerged in water where nutrient solutions are provided. Usually, the water is constantly circulated throughout the hydroponic system to ensure sufficient oxygenation of the roots.
Usually, professional cannabis growers opt for hydro. The argument behind this is that weed plants, grown hydroponically, allegedly grow faster and produce larger buds due to the plants having easier access to nutrients.
Therefore, growing cannabis hydroponically might be tempting at first but beginner growers should know that compared to soil, growing marijuana in hydro requires more maintenance. This is because good soil has a natural pH buffer and nutrient storage. In a hydro system, one would need to constantly ensure that the plant is supplied with the correct amount of nutrients and that the pH is staying in the optimum range. If the system is not running properly, cannabis plants grown in hydro might also succumb to root rot whilst those grown in soil might be able to avoid such issues or recover faster thanks to good soil bacteria.
Growing Weed Plants in Semi-Hydro

Semi-hydroponics refers to growing plants without soil but instead of the roots being submerged in water, they are planted in a growing media that is free of organic soil matters. For example, using coconut coir, pon, rockwool or LECA are all different semi-hydro media that can be used to grow cannabis indoors.
The benefit of using semi-hydro media versus traditional soil is that all factors can be monitored and controlled. Also, almost all semi-hydro media (apart from rockwool) can be reused after careful sterilization and washing, which means that one doesn’t need to buy new soil each growing season.
Unlike hydroponics, in semi-hydro, the roots of the plants are not submerged constantly in water, therefore, theoretically, rotting issues are less likely.
Cannabis plants grown in semi-hydro can be watered by means of using a water reservoir, water cycle spraying (with the use of an automated pump), or the traditional way of simply being given water when the plants need it.
Some might prefer semi-hydro as opposed to traditional soil for their weed plants as there is no mess around and the nutrients can be controlled fully. However, a drawback of using semi-hydro growing media is that there is once again no natural pH or nutrient buffer. This means that with each watering, the plants will need to be given a nutrient solution that is at the correct pH level.
Compared to pure hydroponics, Trichoderma and mycorrhiza can be added to plants in a semi-hydro growing media to ensure healthy roots and optimum nutrient intake.
Which growing media is best for weed plants? As you can see, there is no one-size-fits-all when it comes to choosing the best-growing media for cannabis indoors.
Are you a beginner cannabis grower? It is recommended that beginner growers use traditional soil for the plants, which is much more forgiving in case of an error compared to hydro and semi-hydro setups.
Choosing Growing Containers

Choosing a growing media for your cannabis is not the last step to ensure healthy growth. When it comes to the growing containers for your plants, the choice will depend on multiple factors: the most important one being the growing media.
However, the size of the container, the material it’s made of, and the size of the plant itself are also important factors to consider when choosing the right container to grow weed plants at home.
Sure, plastic nursery pots might be the best economical option. However, cloth bags, air pots, or even terracotta pots might also be worth considering as these materials enhance the airflow around the plant’s roots – and weed plants love their roots to breathe!
How to choose the best growing container for your marijuana plants:
As mentioned, there are a couple of things to consider when choosing one over other growing containers. This might seem like a bit of a dramatic point as ey, as it is just containers, right? Yes and no.
The container you choose does have a direct effect on the health of your cannabis plant. As healthy roots – healthy growth – happy harvest, remember?
To ensure that the root system of your weed plants is strong and healthy, the following are a must:
- Oxygen – cannabis love it if their roots can breathe, therefore, containers that are made of air-permeable materials, like cloth bags or terracotta, might be at the top of your list for to-go containers
- Drainage – weed plants don’t tolerate waterlogging at all and can quickly succumb to root rot. That’s why ensure that they are in a growing media that has a good amount of drainage – some growing containers can aid you with that, such as terracotta for example. Also, the container for your weed plants must have holes where the water can drain from. Actually, if you have other plants they all would feel and grow so much better if the growing media can be properly flushed from time to time to ensure that salt buildup doesn’t happen.
- Nutrients – cannabis plants are very picky when it comes to having the right ratio of nutrients and the right pH.
- Space – unlike some plants that prefer to be more on the root-bound side (eg: Monstera), cannabis plants like to spread their roots and “fly”! Seriously though. The root system of weed plants tends to branch out a lot, hence, you have to ensure that the container they are planted in is sufficiently big to avoid a root-bound situation where the roots might literally start suffocating due to the lack of sufficient oxygen.
Tip: Most cannabis growers will transplant their young plants once in the life cycle. Usually, weed plant seedlings are planted in a one-gallon pot and later on, transplanted to a five-gallon pot.
Important: if you are growing auto-flowering cannabis plants, the experts recommend not to transplant at all as it might cause a shock to the plant and stun temporarily the growth, hence, resulting in a less-than-optimal harvest.
So with these things out of the way, let’s look at some available options for a growing container and summarize the pros and cons of each when it comes to your cannabis plants.
Plastic containers
A lot of cannabis growers opt for plastic containers as they are convenient, easy to find, and budged-friendly, however, plastic containers might not always be the best option for weed plants.
Pros:
- Cheap & easy to find
- Most have good drainage holes
- Easy to add more holes both horizontally and vertically
- Transplanting is easy
- Can be reused easily
- Depending on the material – are relatively stable and usually, even a big cannabis plant won’t tip over
Cons:
- Not-environmentally friendly – opt for pots made of recycled plastic if possible
- Plastic doesn’t provide the same airflow as other materials (regardless of how many extra holes are in there!)
- Depending on the quality of the plastic used, plastic pots might last forever or might crack after the first month
- The root system is not protected from extreme weather conditions – eg: warmth which might be devastating to a plant as it might promote rapid root rot
- Again. Bad for the environment.
Cloth Bags (Fabric Pots)

Fabric pots or cloth bags are becoming more and more popular recently. They are reasonably priced and have perks both for your weed plants and for the environment.
Pros:
- Easy to find & fairly priced
- Amazing drainage
- Optimum airflow around the plants’ root system
- Environmentally friendly
- Can be washed and reused
Cons:
- Require more frequent watering (plants in cloth bags versus plastic pots will dry out quicker)
- The plant might tip over as fabric cloths are really light in weight. If you are using cloth bags ensure that the plants are protected from falling over.
Ceramic pots
Terracotta pots (unglazed clay pots) are a popular, environmentally friendly option to grow just about any plant indoors and outdoors.
Pros:
- Easy to find & fairly cheap
- Environmentally friendly
- Heavy & sturdy – chances are even large plants won’t tip over in terracotta pots
- Fantastic air flow around the roots
- Sufficient drainage
- Can protect the root system against extreme heat
- Can be reused for years
Cons:
- Might break easily if tipped over
- Salt residues are often seen on the outside of the pots – more of a styling problem not a growing one
- Ugly colors :) (more of a personal choice)
- Repotting plants from terracotta pots is not always a breeze
Nutrients

Providing cannabis plants with the right nutrition at the right growing stage is a big part of growing weed plants successfully indoors.
Unlike most houseplants that will be happy if provided with the same fertilizer year long and will grow without any issues, marijuana is pickier and can quickly show signs of dissatisfaction if something is off in the plant’s nutrient solution or pH.
Cannabis plants need both macronutrients and micronutrients to grow and thrive.
The macronutrients are Nitrogen (N), Phosphorus (P), and Potassium (K) – also known as the NPK ratio of fertilizers.
The major micronutrients that weed plants need are Calcium (Ca), Magnesium (Ma), and Sulfur (S). Some other micronutrients (trace elements) such as Iron (I), Molybdenum (Mo), Manganese (Mn), Boron (Br), Copper (Co), Zinc (Zn), Chlorine (Cl) might also be included in fertilizers.
As I mentioned, when it comes to fertilizing weed plants correctly – just a single fertilizer won’t do. That’s because, during their various growth stages, cannabis plants require varying levels of the above-mentioned nutrients.
For example, during their growing (vegetative) stage, weed plants require a higher amount of nitrogen to PK ratio. However, during the flowering stage, the situation switches and cannabis plants then need more phosphorus and potassium to form buds.
How to choose the best fertilizer for growing weed plants indoors?
Unless you are using “super-soil” as mentioned above that is able to sustain cannabis plants during their life cycle without many additional fertilizers needed, you would need to fertilize your plants at one point or another.
The fact that cannabis plants need both macro- and micronutrients means that you need to choose fertilizers that contain both. Or get both purely NPK fertilizers (without any trace elements) and supplement with micronutrients.
How to choose a fertilizer with proper nutritional ratios for cannabis? Our suggestion would be to choose a brand that is known to be specialized in producing nutrient solutions and fertilization schedules for cannabis plants specifically.
For example, some brands are BioBizz, Madame Grow, and HygroGrow (especially preferred for hydro and semi-hydro setups).
During the vegetative stage of your plants, use a fertilizer that has a higher nitrogen-to-phosphorus and potassium ratio. For example, a fertilizer labeled 10-4-4 will consist of 10% nitrogen, 4% phosphorus, and 4% potassium (weight-based). This is also known as a growing solution.
Tip: A good NPK fertilizer ratio for weed plants in the vegetative stage is 9-4-5.
During the flowering phase, as mentioned earlier, the needs of your plants will switch. Therefore, once your weed plants start flowering, you should opt to use a fertilizer that has lower nitrogen but higher phosphorus and potassium ratio. This is also known as a bloom or flowering solution.
Tip: A good NPK fertilizer ratio for cannabis plants in flowering stages is 3-8-7.
Flush your weed plants before harvesting:
Approximately a week or 10 days before your cannabis are ready to be harvested, it is time to stop fertilizing altogether. In order to avoid nutrient buildup forming in the buds, the plants would need to be flushed so that any excessive nutrients leave the growing media.
Note: If you are using a fertilizer specifically formulated for cannabis plants, always follow the recommendation of the manufacturer. It is not advisable to exceed the recommended nutrient dose as this might lead to root burns and stunned growth. As a general rule, young plants will need to be fertilized at first with approximately ¼ to ⅛ of the full dose and that shall be increased gradually with each fertilization. This is to help the fragile and delicate roots of young plants to build tolerance towards the nutrients being introduced.
Important: To ensure that your weed plants are absorbing the nutrients optimally, adjust the pH of the water AFTER adding the nutrient solution to be between 5.8 to 6.2.
Organic vs Mineral Fertilizers for Weed Plants
Organic fertilizers, unlike mineral ones, are based on natural sources. Some growers prefer to use bio-organic fertilizers to ensure that their produce is as healthy as it gets.
Organic fertilizers have both perks and drawbacks, so it is entirely a choice of personal preference and availability of which one to use for your cannabis plants.
For example, organic fertilizers tend to be gentler on the roots and are absorbed slower. They have the added benefit of possibly improving the flora of the soil.
On the other hand, mineral fertilizers, can quickly cause salt build-ups and lead to root burn. However, if one wants to measure accurately the nutrient uptake of weed plants, organic fertilizer cannot be measured accurately with an EC meter.
Important: If you notice that a weed plant doesn’t feel perky and well – avoid fertilizing it immediately (unless you suspect a nutrient deficiency). Plants that are under stress usually slow down their metabolism and don’t consume nutrients. This means that fertilizing an already stressed plant might make the problem worse and lead to root burn.
Humidity

Cannabis aren’t tropical plants that require insane humidity levels of 90%+ but still, our honest advice is: if you want to grow weed easily, then one of the best tools to invest in is a hygrometer.
You want to keep humidity levels in check around your marijuana plants. This is because, while lower humidity levels won’t necessarily mean the dismay of your plants, too high humidity might stress the plants, especially during the flowering stage, and might lead to mold issues on the buds.
Actually, just like with fertilizer and light, cannabis plants need different humidity levels based on their growth stage.
Seedlings
If your seeds have just sprouted, those little guys will appreciate high humidity. Seedlings don’t have just yet a fully developed root system, so keeping the relative humidity around them high, will help young plants absorb vapor through their leaves.
The same goes for clones – i.e. cuttings that haven’t fully rooted yet. The higher humidity will help the clones establish a root system without stressing the leaves.
For seedlings & clones, it is recommended to keep the humidity between 60% and 80% in the first few weeks. However, ensure that the young cannabis plants are not staying stagnant and that there is sufficient airflow as well.
Cannabis Plants in Vegetative Growth
During the growing stage, i.e. the vegetation, young cannabis plants will also appreciate higher humidity levels but their tolerance level for optimum growth is larger.
It is best to keep weed plants in the vegetative stage at humidity levels between 50% and 70%. A dry microclimate might stun the growth of the plants.
Cannabis plants during the flowering stage
As soon as your weed plants are switched to the flowering stage by providing them with at least 12 hours of darkness, the humidity needs to be decreased.
The optimum humidity range for weed plants in flowering is between 40% and 60%.
However, once blooms start forming, you need to be especially careful not to have too high humidity as then low humidity is best. This is to ensure that mold won’t start forming on the buds and ruin the harvest.
Harvesting & Curing
After being harvested cannabis buds need to be dried slowly and in a balanced way. If you rush the drying process, you might end up with crunchy buds that are impossible to cure optimally.
Weed buds dry best at room temps with no more than 50% humidity and at these conditions need around 10 to 14 days to be ready.
How to adjust the humidity around cannabis plants
While in the seedlings stage, you can use a propagator or humidity dome to increase the humidity around your plants. Once they start growing out of their humidity enclosure, you might want to consider investing in a humidifier that has an automatic setting to keep the humidity around the plants constant.
Personally, we wouldn’t advise misting the leaves of your cannabis plants in an attempt to increase the humidity. Misting does little to raise the humidity around plants and since water droplets land on the leaves, this in turn might create an environment for fungi and other pathogens growing on the leaves.
Again, keep in mind, while increasing the humidity, ensure that the airflow around the plants is sufficient.
If the humidity remains too high whilst not using anything to increase it, during the flowering stage of your cannabis plants, you might need to invest in a dehumidifier. Keep in mind that dehumidifiers might increase the temperature in the room, hence, you might need to plug in more fans or an AC whilst using it.
Temperature
Temperature is another important factor in the growing environment of cannabis plants that can both positively or negatively influence the development of the plants and later – the harvest.
Just as with other factors, weed plants have different temperature preferences during their different stages of growth.
Tip: Chances are you already have a thermometer at your home, but we strongly suggest that if you want to grow weed indoors, get a digital thermometer that also records the minimum and maximum temps in a room for the last 24 hours.
Seedlings & Clones
Seedlings and clones should be kept warm to speed up the metabolism of the plants and to positively influence root formation. The average temperature day and night for seedlings and clones should be kept between 20°C and 25°C.
Vegetative Stage
During their vegetative growth stage, weed plants will also grow best if kept warm.
Therefore, for optimum growth of your cannabis plants, try to keep the temperature around them in the following ranges:
- During the light cycle: 20°C-28°C
- During the dark cycle: 15°C-20°C
Flowering Stage
In nature, once seasons start changing from Summer into Autumn, the light hours become less and temperatures also tend to drop. For your weed plants to feel at their best, you would want to emulate the natural temperature cycle as well as possible.
During flowering, to ensure optimum bud development and not risk exposure to excess head, try to keep the temperature around your weed plants in the following range:
- During the light cycle: 20°C-25°C
- During the dark cycle: 15°C – 20°C
The slightly cooler temperatures during the flowering stage will ensure that your plants will bloom optimally and that buds will form well. It is also known by experts that a slight temperature dip during the flowering phase aids in developing a more versatile cannabinoid and terpene profile.
Important: during any stage of the development of your cannabis plants, ensure that the temperature is never going above 30°C. Temperatures higher than this can cause physiological stress, foliage damage, root rot, and be potentially detrimental to cannabis plants.
Air Circulation
Cannabis plants hate stagnant air. So if you want to grow weed indoors successfully, fans are your friends.
Plants require fresh air and carbon dioxide for photosynthesis. To provide this, it is recommended to have a consistent flow of air in your grow room by using an exhaust fan to remove warm air and a port or passive fan to bring in cool air.
Proper airflow is crucial for plant growth as it prevents CO2 depletion and the development of high-humidity pockets that can lead to nutrient lockout, pest infestations, mold, or mildew.
Oscillating fans can also be used to strengthen plant stems.
When setting up fans, clip-on fans are suitable for small spaces, while medium-sized oscillating fans or big floor models are ideal for larger grow rooms. Fans should be positioned to provide even airflow without directly blowing onto plants to avoid wind burn.
Growing Cannabis Indoors – Common Issues
Is your cannabis plant not feeling well? Do you see leaves turning yellow or some mysterious spots have appeared?
The good news is that whenever something is off with your weed plants, you will know immediately. The bad news is, cannabis plants react to almost everything so it might be hard to pinpoint at first what exactly is wrong.
Pests
Prevention is key when it comes to pests and weed plants. That is why when reusing pots and other growing equipment, sterilizing them appropriately at first is best.
For example, most pots and growing media (eg: pon, LECA) can be sterilized in a weak bleach solution. Simply mix 1 part bleach to 10 parts water and soak the pots or growing media completely. Leave the solution overnight and wash it off throughout with clean water afterward.
Using clean tools, ensuring that you are using non-outside clothes when entering the growth room, using sterile potting media, and removing diseased plants timely, are other methods to prevent a pest infestation on your cannabis plants.
The most common pests that attack cannabis plants are spider mites and thrips.
Spider mites are usually found first on the underside of the lowest leaves. You might also notice some webbing around the leaf veins and petiole.
Spider mites suck out the plant sap and therefore you might notice that your plant has slowed down its growth and that some leaves start turning yellow.
Thrips are also found on the underside of leaves and usually are attracted the most to the newest growth (i.e. chances are you will find them in the newest leaves first). Thrips, like spider mites, are miniature, tend to jump around, and don’t leave a tell-tale webbing behind.
These tiny destroyers leave tiny dot-like markings on the leaves, suck out plant sap and as a result, weaken the weed plants rapidly. Thrips also lay their eggs inside leaf tissue so they are extremely hard to eradicate and require vigilance.
If you suspect that your weed plants might have fallen victim to pests, make sure to check our detailed guide on how to spot a pest problem on cannabis plants early on, so that you can get rid of the buggers once and for all.
Mold
As mentioned, sufficient airflow is a must if you are growing weed plants. Having good air circulation around the plants is essential, especially during the flowering stage.
To prevent mold issues on your plants: don’t mist your plants and avoid getting water on the foliage, invest in sufficient fans, keep track of the humidity, and if needed, use a dehumidifier.
Nutritional Problems
Cannabis plants are sensitive to nutritional deficiencies, too much of an element, and wrong pH values.
That is why it is always best to invest in a good growing media and check the pH and EC levels of water before watering the plants.
Hint: Having a pH meter and an EC meter on hand can save you loads of trouble if you are growing weed plants.
Need more help with recognizing nutritional problems in weed plants? Check this detailed guide here.
How to Grow Weed – FAQ
Should you repot your weed plants?
As mentioned previously, the roots of cannabis plants tend to branch out and sooner or later they will need a bigger pot.
However, don’t fret, you don’t need to constantly transplant your weed plant in a new pot. It is sufficient to initially plant the established seedlings in a 1-gallon pot (4L pot) and later on, at about week 4 (right before flowering starts), transplant it into a 5-gallon pot (20L pot).
Avoid repotting your weed plants during flowering unless you suspect rot-related issues.
Also, if you grow weed plants that are autoflowering, try not to repot them more than once to avoid stunned growth due to stress.
What’s the best soil to grow weed?
For beginner cannabis growers, it is recommended that super soil be used. Experienced growers and seasoned pros might opt to grow weed in alternative ways, such as hydro and semi-hydro. It is all a matter of personal choice and experience.
How long does it take to grow weed?
It takes approximately 3 to 8 months before a cannabis plant is ready for harvest. The time depends on whether the plant has been grown from seed, the strain and whether it is an autoflowering one or not.
How to grow cannabis at home?
If it’s legal, one can successfully grow weed indoors. Light, temperature, humidity, soil, nutrients and watering are important factors that will need to be carefully taken care of.
Where does cannabis grow naturally?
Marijuana, also known as weed, is currently spread and grown (where legal) globally. However, horticultural experts believe that cannabis has been originally grown in South and Central Asia.
Why are the stems of Cannabis plants turning purple?
Purple stems on weed plants can be due to various reasons, for example: genetics, cold temperatures, nutritional deficiencies, stress or simply the plants being too close to the light source. In most cases, purple stems on marijuana are not a major cause of concern and once the reason has been identified and sorted out, the plants should turn back to green (unless of course the purple stems are a genetic trait).